
Introduction to Oculus Quest 2 Controller Battery Replacement
Changing the battery in your Oculus Quest 2 controller can seem daunting at first. However, with a bit of guidance, it becomes a straightforward task. This guide will walk you through the process step-by-step, ensuring you can do it quickly and painlessly.
Identifying the Battery Compartment
First, let’s locate the battery compartment on the Oculus Quest 2 controller. The battery is situated on the handle, opposite the trigger. If your controllers still have the left and right stickers on them, you’ll find the battery compartment right beneath these stickers.
Opening the Battery Compartment
To open the battery compartment, push down on the cover away from the circular part of the handle. This action will reveal the compartment housing the battery. Repeat the same steps for the other controller.
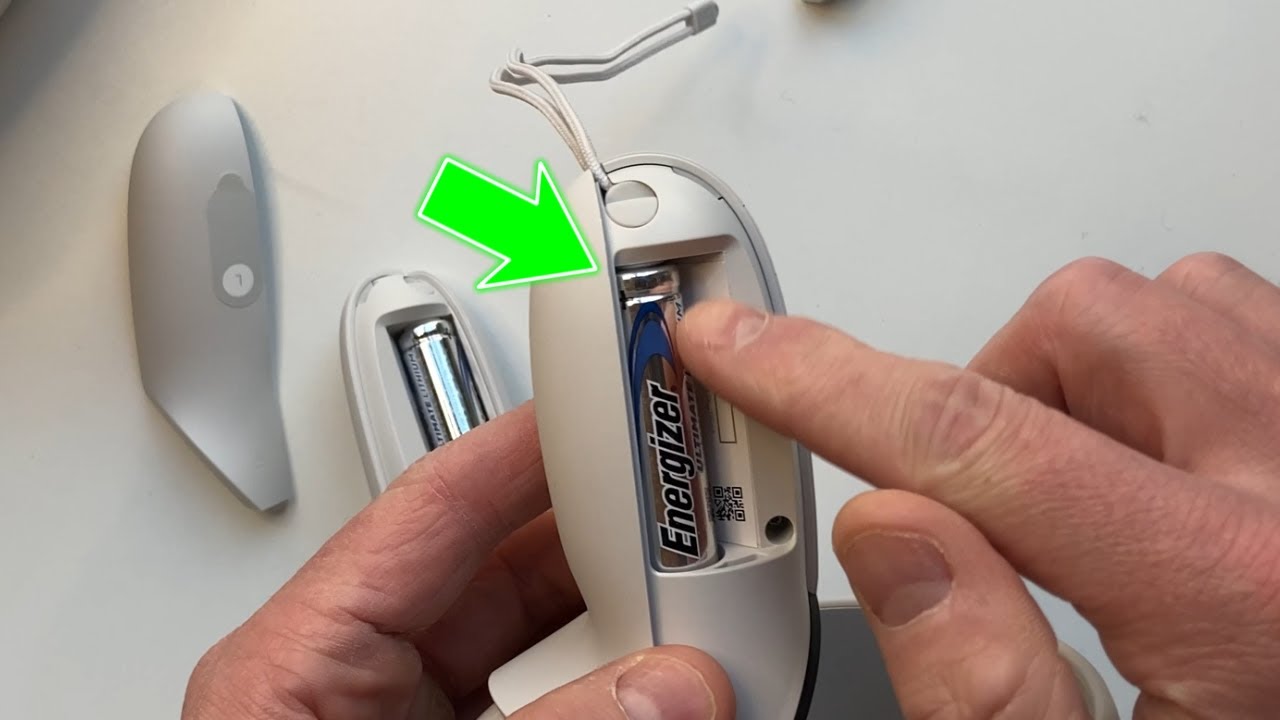
Removing the Old Battery
Inside the compartment, you’ll find a single AA battery. The positive side of the battery points away from the circle. To remove it, apply pressure towards the circle. Here’s a step-by-step method to do this:
- Push the battery towards the circle.
- Use a plastic card for leverage.
- Pull the battery out gently.
Tips for Removing the Battery
While removing the battery, avoid using metal tools like screwdrivers or scissors. Instead, use something like a library card or a credit card. This prevents any potential damage to the battery or the compartment.
Inserting the New Battery
Once the old battery is out, insert a new AA battery with the positive side pointing away from the circle. Push the battery into the compartment until it fits snugly.
Final Steps and Testing
After inserting the new battery, close the compartment by pushing the cover back into place. Test your controller to ensure it’s working correctly. If it powers on, you’ve successfully changed the battery.
Battery Recommendations
For longer-lasting performance, consider using high-quality lithium AA batteries. These batteries provide extended playtime and reduce the frequency of replacements.
Common Issues and Troubleshooting
Sometimes, even after replacing the battery, the controller may not work. Here are some common issues and their solutions:
- Ensure the battery is inserted correctly.
- Check for any debris in the battery compartment.
- Try a different battery.
Frequently Asked Questions
How often should I change the battery?
The frequency of battery changes depends on usage. Heavy users may need to change batteries more frequently.
Can I use rechargeable batteries?
Yes, rechargeable AA batteries are a great eco-friendly option.
What should I do if the battery compartment is stuck?
If the compartment is stuck, gently wiggle the cover while applying downward pressure.
Is it safe to use metal tools to remove the battery?
No, avoid using metal tools as they can damage the battery and compartment.
Conclusion
Changing the battery in your Oculus Quest 2 controller is a simple process once you know how to do it. By following these steps, you can ensure your controllers are always ready for your next VR adventure. Happy gaming!
Additional Resources
For more information on battery types and where to purchase them, visit this link.